View previous article: How we design new lift kits (Part 1)
Steering knuckles have arrived and so does a new truck. Phase one of the installation consists of taking lots of measurements (ride height, strut height, coil length, anything and everything we may ever need and then some more) as well as several thorough test drives. After the measuring is done, the tear down begins. All items that will be relocated are removed from the vehicle and a clean undercarriage is ready for modification.
At this point we take a step back and decide on a general plan that will meet our main objectives. First, we want this kit to install easily. The R&D department is constantly installing kits to make sure everything fits on new and old models. We do not use hammers to install our kits; it needs to fit and fit well. Next, it needs to look good on the truck. The recently released High Clearance designs give trucks and SUVs a tough clean look. Along with an aesthetically appealing design the kit has to function on and off road. We match the factory geometry to keep the on road performance. Off road performance is improved by strengthening and protecting the undercarriage and increasing ground clearance. The final key feature is the strength of our parts. We offer the best warranty in the business and stand behind our products for a reason, and if you somehow manage to break a BDS part… you deserve a new part.
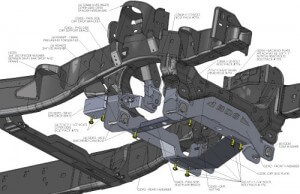
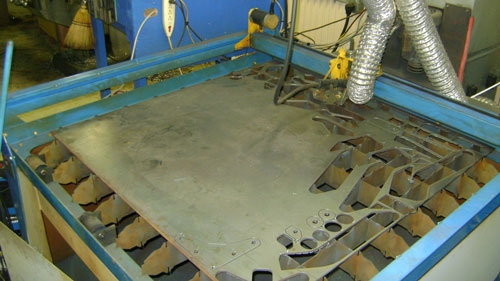
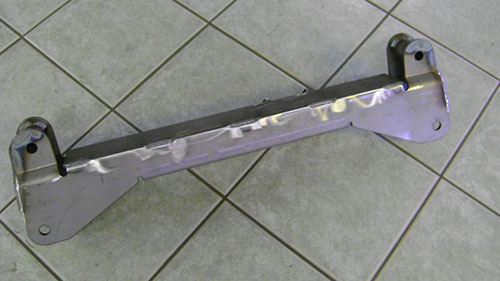
We have a plan of attack set, and start by creating models in Solid Works (Our 3D CAD software) and virtually installing them on the frame. Measurements are double checked with the truck on the hoist and tolerance ranges are set. We are feeling lucky and cut out our first set of brackets on a CNC (computer numerical controlled) plasma table. Plates are formed in the press and welded up. The raw brackets are installed and revisions are created. If everything looks good, the brackets are clear coated and reinstalled. Once again the rest of the factory parts are installed on the truck with the exception of the coils on the strut (or torsion bar adjusters).

The first testing the kit undergoes is a complete range of motion test, this ensures that brake lines are long enough and there is adequate clearance between moving parts. Wheels and tires are installed with clearances once again noted. This is why the backspacing that we list is critical. An aftermarket wheel that is the recommended size will give the best possible clearance and allow for the largest tire size. The coils (or torsion bars) are reinstalled and the truck is off for its maiden voyage to the next hoist for an alignment. Alignment specifications are printed and filed along with any noted areas of interest for the next test installation.
Finally, it is time for a real test drive and a lot of miles to be driven…